Saturday, October 17, 2009

Sweet Sticky Purple Fried Rice (Rice, Less Boring 2.0)

Yeah, I've been MIA for a little bit because I've been making the same things over and over... A couple days ago, I got an email from a reader asking me where all the food porn went, so I want to thank you all for sticking with me.

And speaking of sticking...here's a sticky treat for you: a recipe! This is something I made on a whim: Sticky Sweet Purple Fried Rice (but not really just rice...)

I actually used more than just the typical boring rice. Bwahaha, I hid all the nutritious stuff in.

This recipe incorporates millet, barley, brown rice, and black rice with jewel yam. It works best if you have a rice cooker.

Here's what you need:
1 cup brown rice
1/4 cup black rice
1/4 cup millet
1/4 cup pearl barley
1 jewel yam (they work better than garnet yams)
1 bag of mixed frozen veggies
water
vegetable oil
salt

1. Wash the rice, millet, and barley until the water runs clear. Place in rice cooker.
2. Wash and chop jewel yam into chunks. Layer on top of rice. There is no need to mix.
3. Add water until it barely covers all the contents.
4. Cook in rice cooker until done.
5. Heat a non-stick pot and add a bit of oil. Add the frozen veggies and stir-fry. Add salt to taste.
6. Add the rice and stir.


And that's pretty much about it. :)
It's surprisingly sweet without any additive sugars and so much more nutritious than white rice.
Feel free to adjust amounts to your liking.

Tip: Keep the rice cooker away from walls. Black rice stains and it's a pain to clean if it splatters.

Happy eating!

Friday, September 18, 2009

From the College Kitchenette: Rice, Less Boring

Hi, everyone!

I know I've been MIA for a while now. I haven't been cooking that many different dishes lately due to the lack of time and space. However, I thought I might share something with my readers today. It's not a recipe, but it's a way to make your rice less boring!

Throw some yams with your rice into the rice cooker! When it's done cooking, it's nice and soft. Yummy. A good way to give your food some color without doing that much work. Just make sure you adjust the amount of water to include the yams or you'll have really dry yams and really dry rice.


And try experiment with different types of yams. My favorite is purple yam!

Monday, September 7, 2009

From the College Kitchenette: Cooking Frenzy

So, classes begin tomorrow, which is okay with me. The only thing is...I have to intern and work as well, which leaves me no time to cook during the week! I have no choice but to cook enough to last me through Thursday. Here are the dishes I whipped up today...

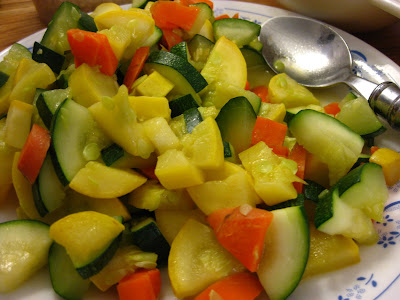
First, we have Zucchini Medley...which consists of carrots, summer squash, zucchini, (obviously). I was excited that Whole Foods had them on sale for $0.79 per pound. I would've added pine nuts, but I haven't got the time or budget to get it.

Squash: $0.40
Zucchini: $0.44
Carrot: $0.56/3 = approx $0.19
Salt: $3.99/150 = approx $0.03
Oil: $3.99/50 = approx $0.08
Total for dish = $1.14

Next, we have Tofu Scramble, another favorite of mine...except I forgot to get garlic. It tasted fine, nonetheless.

Bell Pepper: $0.93/2 = approx $0.47
Firm Tofu: $1.25
Onion: $0.77/4 = approx $0.19
Turmeric: $3.39/30 = approx $0.11
Oil: $3.99/50 = approx $0.08
Salt: $3.99/150 = approx $0.03
Black Pepper: $1.00/50 = $0.02
Total for dish = $2.15

Up next, we have String Bean Stir-fry! Very yummy. I was pleased that the veggie crumbles were on sale at Jack's 99c Store.

String Beans: $2.00/2 = $1.00
Veggie Crumbles: $0.99/5 = approx $0.25
Oil: $3.99/50 = approx $0.08
Total for dish = $1.33

Then, we have the eggplant my roommate bought from Chinatown and a Vietnamese Basil plant I bought from Union Square's farmer's market.. So, hooray for Eggplant Stir-Fry!

Chinese eggplant: $1.10/3 = approx $0.37
Bragg's Liquid Aminos: 4.19/50 = approx $0.08
Basil: $2.00/25 = approx $0.08
Salt: 3.99/150 = approx $0.03
Oil: $3.99/50 = approx $0.08
Total for dish = $0.64

Last but not least is cooked corn on a cob. Bought at Union's Square's Farmer's Market. Crisp and sweet. Nommy.
5 cobs of corn: $2.00
Total for dish = $2.00

Add all of this with brown rice (7.95/50 = approx $0.16) and it's $7.42 for 4 meals which gives a grand total of $1.86 per meal.


Hooray for frugal and time-constrained college living. We don't even have enough counter space in the kitchenette that we had to use the top of our drawers for the appliances and a place to put the food. But it's still worth not having to rely on cafeteria food or eating out all the time!

P.S.I apologize for not posting recipes...but I've been so hectic trying to get things settled down in the dorm.

Sunday, August 30, 2009

From the College Kitchenette: 1st Meal!

I'm incorporating a new section into my blog called "From the College Kitchenette" which will be about what I'm cooking in my college kitchenette (which I'm thrilled about because I've escaped the hideously expensive meal plan). It'll be a food log of my vegan dishes keeping in mind a college budget and lack of fancy equipment.


So, here it is first meal cooked in a college kitchenette! It's not much considering I'm lacking a lot of ingredients from back home, but it's better than what most college students eat!


Cost:
Flavored veggie crumbles: 0.99/5 = approx $0.25
Vegetable stir-fry:
Organic broccoli: 4.16/3 = approx $1.39
Organic carrot: $0.20
Oil: 3.99/50 = approx $0.08
Bragg's Liquid Aminos: 4.19/50 = approx $0.08
Salt: 3.99/150 = approx $0.03
Brown rice: 7.95/50 = approx $0.16


There you go. Enough for lunch and dinner.
Total of $2.19, which makes $1.10 per meal...the same price as something from the dollar menu of a fast food restaurant. Much better than a meal plan, which for my school is $1800 for 10 meals per week for the semester ($10 per meal).

Monday, August 24, 2009

Broccoli "Beef"

Think Chinese Food. Think...Americanized Chinese Food and what do you get? If you're not thinking General Tso's Chicken, spring rolls, or Broccoli Beef, then you've probably haven't ordered enough Chinese Take-Out.

For me, I think I'll be fine surviving on just stir-fried broccoli forever without the faux meat, but hey, it's not Broccoli Beef with some "Beef"...it'll just be...broccoli.


Ingredients:
1 head of broccoli
1/2 tbsp of vegetable oil
1/2 pack of veggie strips (I typically use Smart Strip Steak)
3 tbsp water
1/2 tbsp soy sauce or soy sauce alternative
1/2 tsp agave nectar
1 dash of salt

1. Separate the broccoli head from the stalk. Chop the head into desired size. Chop the stalk into slices and keep separate. (No wasting vegetable parts!!!).
2. Heat the pan. Pour the oil to coat the bottom of the pan.
3. Add the chopped broccoli stalks. Wait about 30 seconds before adding the broccoli flowers. Stir.
4. Add 2 tbsp of water and cover the pan with a lid until the broccoli turns into a nice shade of green. Add salt to taste and stir.
5. Transfer broccoli to plate and arrange in a circular fashion while cooking the veggie strips.
6. Add veggie strips into the pan and add the soy sauce and agave nectar. Add 1 tbsp of water if necessary to prevent it from burning and sticking to the pan. Stir-fry until lightly burnt.
7. Transfer to the center of the broccoli circle.

Serve with rice.

Happy eating!


P.S. I'm thinking of starting a product review/restaurant review thing going on here in addition to the recipes. What do you guys think?

Also, I have noted that I have a tendency to spell out everything because most people I know aren't very adept at cooking...I will attempt to be more succinct, but this could be like "Cooking Vegan for Dummies!"

Monday, August 17, 2009

Stirred Veggie Lo-Mein Delight


I like noodles. I like them hot or cold, with or without sauce, so it should not be a surprise that I'm posting a noodly dish here that uses my childhood favorite vegetable, the Taiwanese Cabbage, which is sweeter, larger, and crunchier than normal cabbage.

Here's a recipe that's good for a medium sized family or something to eat over several days. You'll need a big non-stick pot to cook this! Like the name suggests, this dish will take a lot of stirring, so get ready to use those arm muscles!

I like this dish because it's light, a bit sweet, a bit salty, but won't leave you screaming for a glass of water.


Ingredients:
1 bag of shanghai noodles (be sure to check for no eggs!)
4 dried shiitake mushrooms
1/4 cup veggie crumbles
1 package flavored tofu
1 long carrot
7-8 leaves of taiwanese cabbage
5 chinese pickled turnips
1 tbsp of soy sauce or soy sauce substitute
vegetable oil
2-3 dashes salt to taste


1. Soak the shiitake mushrooms in a bowl of hot water until soft.
2. Bring a pot of water to boil and add the noodles. When it boils again, add a cup of cold water. Repeat two more times. Drain noodles.
3. Chop flavored tofu, mushrooms, carrot, and pickled turnips into thin strips.
4. Chop the cabbage into thin strips. Make sure to put the hard stems of each leaf in a separate pile.
5. Heat pot and add oil to lightly coat the bottom. Stir-fry shiitake mushrooms until lightly burnt. Add the veggie crumbles and turnips. Cook until lightly burnt.
6. Add the tofu. Add the tablespoon of soy-sauce. Stir-fry until that's also lightly burnt. (Do you see a pattern here?)
7. Add the carrots and the stems of the cabbage. Stir and then add about 1/4 cup of water. Close lid and let it steam for about a minute.
8. Remove lid. Add the cabbage by the handful while continuing to stir. (If you add it all at once, it's harder to get it all evenly cooked). Add 2-3 dashes of salt to taste.
7. Turn down the heat to low. Remove about 1/2 of veggies onto a separate dish (this will aide in mixing the noodles). Unclump the noodles and add by the handful while stirring.
8. After the noodles have been added. Add 1 tbsp of vegetable oil and stir.
9. Add the veggies that were removed before and stir until well incorporated.

Serves 4-6.

Happy eating!

Monday, August 10, 2009

Tofu Scramble

This is the vegan version of scrambled eggs.
Totally deeeeliisshhh and satisfies the cravings for that texture.

What you'll need:
1/2 bell pepper (you can combine 1/4 of two different colors, like me)
1/2 onion
1 clove of garlic
1/4 cup veggie crumbles
1/2 tbsp olive oil
1 package of firm tofu
1 tsp turmeric
2 tbsp nutritional yeast (optional)
salt to taste (optional)
black pepper (optional)

1. Heat the pan. Sauté the bell pepper, onion, garlic, and veggie crumbles.
2. Add the block of firm tofu. Use spatula to mash it into crumbles. Stir.
3. Add nutritional yeast, black pepper, and/or a pinch of salt if desired.
4. Add turmeric. Stir until it looks egg-like and serve!

Happy eating!

Saturday, August 8, 2009

Banana Nut "Ice-Cream" Bites


Oh, sweet perfection...here's a treat for you to beat the summer heat! It's popular with kids too!
Of course I like vegan ice creams sold
in stores, but sometimes it's a bit too processed with weird ingredients, so I whipped up something equally as scrumptious. I am hooked on these little suckers!

Here's what you need:
1 1/2 cups of raw nuts (I used mostly pecans, with some almonds and cashews).
3 medjool dates, pitted and chopped.
2 ripe bananas.


1. Process nuts in food processor until crumbly.
2. Add the dates and process until integrated into the mixture. It should become dough-like when pressed with fingers. Scoop into a bowl.
3. Chop banana into bite sized pieces.

4. Cover banana with the "dough" and place onto a plate. This will make your hands very messy, but I think kids enjoy this step. If you accidentally smoosh the banana, it's okay...it'll solidify in the freezer.
5. Cover with plastic wrap and freeze for at least 3 hours.


Makes approximately 18.

Happy eating!

**Tip: If you have problems with the treats sticking to the plate after being frozen, use a butter knife to separate or you can use wax paper to begin with.

Saturday, August 1, 2009

No-Bake Blueberry "Cheesecake"

This recipe is a variation of the one from The Post Punk Kitchen. If you haven't checked out their stuff, you better; it's awesome! Instead of strawberries, I used blueberries because I just picked a bunch yesterday! And again, I'm on the oven-ban. Baking makes me cranky in the summer. The original called for a spring-form pan, which I didn't have, so I just used a regular tin pan. It's just a little harder to serve, but other than that...no big difference.
Anyways, you will need a food processor to make this.

Crust:
1 cup raw pecans
1 cup raw almonds
1/4 tsp salt
4 medjool dates, pitted and chopped

Filling:
3 cups raw cashew (soaked for 3 hours)
1/2 cup agave nectar
1/4 cup water
1/4 cup fresh lime juice
1 tsp vanilla extract
1 1/2 cup blueberries
3/4 cup coconut oil
, melted just before using (To melt, place coconut oil in a container and place that container in a bowl of hot water. Use immediately or it will solidify)

1. Process the nuts and salt in a food processor fit until they become fine crumbs.
2. Add dates and process until the texture becomes dough-like.
3. Press the crust mixture firmly onto the pan.
4. Process cashews in the food processor. Add agave, water, lime juice, and vanilla. Process until very smooth and slightly purple.
5. Add berries and puree until the mixture is smooth. With the processor running, add the melted coconut oil in a steady stream.
6. Pour the filling into crusted pan. Cover with plastic wrap and refrigerate overnight. It will set and be very dense!

Serves 12-16.

Happy eating!

Wednesday, July 29, 2009

Baked Carrot Fries

As requested by JJ Express Magazine for their food issue. So, this recipe was relatively simple to make...and turned out pretty tasty.

Ingredients:
-carrots
-olive oil
-black pepper

The instructions given to me by the editor-in-chief: "Cut 1 lb of long carrots into French Fry shape (in half a few times). Put on a baking sheet and drizzle with 3 tbsp olive oil. Toss carrots so they are covered in oil. Add a little bit of black pepper. Put in the oven and roast for 20-25 minutes, or until soft, turning them once or twice during that time. Let cool, and munch. Yum!"

Of course, I do not have 1 lb of carrots lying around the house, so I just made do with two carrots.That is why it turned out a bit more oily than I would like (and because I had a little accident while pouring the oil. Oops.) And I used a toaster oven instead of a real oven because it's just so much easier. I used 375°F on my toaster oven for about 25 minutes.

Happy eating!

Monday, July 27, 2009

Salad Feast w/ "Honey"-Almond-Mustard Dressing

We rarely turn on the A/C in the summer because my mother insists on cutting the size of our bills. Sometimes, it gets up to 85-90 inside with no real air circulation and I'm sweaty like no tomorrow. Hence, I am getting very turned off by using the stove or ovens now. (No pun intended). So, this entry will highlight those days when we're too bummed out from the heat to do anything.

As you probably already know, Chinese eating is very communal and for us, salad is no different. We just grab the amounts of things we want from the center to our plates and everyone is happy. It's a great thing to do even with guests around. This is another reason why I usually never order salad in a restaurant. When you have salad feasts, no other salad really matches up after that.

That's what a typical salad night prepped by me is like...

Here's a list of what's pictured:
-Alfalfa sprouts
-Almonds
-Bell peppers
-Bread
-Broccoli
-Carrots
-Cauliflower
-Cucumbers
-Mixed Salad Greens
-Nutritional Yeast
-Orzo Salad
(Orzo, Tomatoes, Cucumbers, Pine Nuts, Sunflower seeds, Lime Juice, Bragg's 24 Spices)
-Raisins
-Red cabbage
-Tomatoes
-Wheat Germ
-Vegit Seasoning
-Salad Dressing (varies depending on what we're craving)
Not Pictured:
-Avocados (The ones bought rotted, so we couldn't eat them. Shame, I love avocados)

Okay, let's cut to the chase. The dressing.

Ingredients (from most to least:
-Water
-Dijon Mustard
-Almond Butter
-Tahini
-Agave Nectar
-Lime Juice
-Nutritional Yeast
-Flax Seed Oil

I don't use any measurements, I just do it it by eyeballing it and mixing to taste. The tahini is bitter, so the don't use too much and try to balance it out with lime juice. The nutritional yeast is for thickening the dressing.

I may go experiment and find out exact measurements if anyone requests.

Thursday, July 23, 2009

Ants Crawling Up a Tree (螞蟻上樹)

Pronounced: má yǐ shàng shù.One of my favorite dishes...
Obviously, there are no ants or trees in this dish. The "trees" are the long strands of bean thread and the "ants" are the meat (or in this case, the crumbles). Kinda like Ants on a Log, huh?

It sounds more appetizing in Chinese than in English, heh.
Anyways, it's traditionally made with pork, but I prefer my veganized version.

I am a sucker for bean thread. When cooked correctly, it's chewy, elastic, and totally better than regular noodles. You can find them at your local Asian grocery store. They usually come packed in pink netting. Also, the color of the bean thread is CLEAR and should not be confused with rice vermicelli, which is white in color.

What you'll need:
2 bundles of Chinese Vermicelli/Bean Thread (粉絲-fěn sī)
3 stalks of scallion
2/3 cup of veggie protein crumbles
2 tbsp soy-sauce (or soy-sauce alternative)
vegetable oil
water
Chinese chili sauce (optional)

1. Soak the bean thread in a pot of water until soft.
2. Chop the scallion into small pieces. Separate greens and whites.
3. Mix the soy-sauce mixture in a small bowl: 2 tbsp soy-sauce + 6 tbsp water.
4. Use scissors to cut the bean thread sparingly. This is to make it easier to pick up and eat later.
5. Heat pan and pour enough oil to lightly spread around. Add the veggie protein crumbles. Stir-fry until slightly burnt.
6. Add the scallion whites. Add soy-sauce mixture. Add chili sauce if desired. (I don't use it because I don't like spicy foods) Stir. Add water if necessary to prevent burning.
7. Drain bean threads and add to pan. Stir and add enough water to cover bottom of the pan. Cover pan with lid and let it sit until the bean threads are soft. This takes about 1 minute.
8. Turn off heat. Add scallion greens. Stir and serve with rice.

Happy eating!

Wednesday, July 22, 2009

Eggplant Stir-Fry (炒茄子)

After two days at the beach, I came home to lots of newly sprouting salad leaves as well as a bushy basil plant. Mom insisted that we prune it and cook it in a dish. So, here it is, in all it's glory, basil in the Eggplant Stir-fry. Oh, poor basil plant, you thought you had the chance to grow big and strong while we were gone...but, HA! WE'RE GONNA EAT YOU!

What you'll need:

1/2 cup of basil
2 chinese eggplants
soy-sauce (or soy-sauce substitute-- I use Bragg's)
vegetable oil
water

Steps:

1. Place eggplants on cutting board horizontally. Chop each into fours. Then, chop into rectangular slices.
2. Prepare the soy-sauce mixture in a small bowl: 2 tbsp soy-sauce + 3 tbsp water.
3. Heat pan on high. Pour a little bit of oil to coat the bottom of the pan. Add the eggplants. Stir well.
4. Add the soy-sauce mixture. Stir and cover the pan with a lid.
5. Add water if needed to avoid burning. Let it cook until all eggplants are evenly browned.
6. Add basil. Stir-fry for about 20-30 more seconds.
7. Turn heat off and serve with rice.

Happy eating!

Thursday, July 16, 2009

Mung-Bean Sprout Stir-Fry (炒绿豆芽)

This is a simple dish with ingredients that you can grow at home and minimal prep time. I had just sprouted a bunch of mung beans in a jar and boy, do they taste super-fresh and delicious!

Ingredients:
-Vegetable Oil
-Mung-Bean Sprouts
-3 Stalks of Scallions
-salt (if desired)

1. Cut off the roots of the scallions. Chop the white parts and the green parts into one inch segments. Make sure the whites and the greens stay separate.
2. Heat the frying pan. Add a bit of oil. Stir-fry the scallion whites.
3. Toss in the sprouts and stir-fry for about 10 seconds. Close the lid for about 30 seconds to 1 minute. (Don't over stir-fry or the sprouts will become limp and soggy.) Add a pinch of salt if desired.
4. Turn off heat and stir in the scallion greens. (The greens will become yellow with heat. That's why it's wise to add it last.)
Serve with rice or noodles.

Happy eating!

Monday, July 13, 2009

Potato Salad

Ingredients:
-Cucumber
-Carrot
-Asparagus
-Potato
-Apple
-Vegenaise

1. Chop the the cucumbers into small cubes.
2. Chop the rest of the vegetables into cubes and/or small pieces.
3. Boil potatoes in a pot of water until almost done. Add carrots and wait for it to boil again. Add the asparagus.
4. After boiling, drain the vegetables well and let cool.
3. Stir in a generous amount of vegenaise
.
4. Add the chopped apples.

Happy eating!

Wednesday, July 8, 2009

Ma-Po Tofu (麻婆豆腐)

**Note: My mother does not eat scallions due to religious reasons, so I've omitted them when cooking this dish... and we're not fans of spicy foods, so no hot sauce for us. (In case you're wondering why the picture doesn't look like Ma-Po Tofu in the restaurants...)

What you'll need:
2 dried shiitake mushrooms
1 package of soft tofu
1 cup veggie protein crumbles
soy sauce (or soy sauce alternative)
vegetable oil
water at hand
chinese chili hot sauce (optional)
scallions (optional)

1. Soak the dried shiitake mushrooms in hot water until soft.
2. Cut the tofu into cubes. (I used soft tofu in this case.)
3. Cut the scallions. Separate the whites and the greens.
4. Set pot on burner and turn on heat to high. Wait until the pot is dry and hot before adding a bit of oil to coat the bottom of the pan.
5. Add
shiitake mushrooms and scallion whites. Stir-fry until mushrooms are lightly burnt. Add protein crumbles.
6. Add 1 spoon of soy-sauce (or 2 spoons of Bragg's). Add a bit of water to prevent the crumbles from drying out and burning. (This is also where you add the hot sauce if desired.) Stir.
7. Add the tofu and stir. Add water if needed to prevent from drying. Turn heat to medium. Close the lid and let it sit for about 30-45 seconds before stirring again.
8. Do a quick taste test. If too salty, add a few pinches of sugar. Stir and pour into bowl.
9. Quickly heat the scallion greens into the pot for about 30 seconds. Garnish the dish.

Serve with rice.

Happy eating!

P.S. I might upload a picture of the hot sauce and scallion version if I choose to cook it that way in the future.

Monday, July 6, 2009

Flavored Tofu with Kelp Bow-Ties

Today, I am posting my first asian style dish and I'm sort of nervous about it. You're all probably thinking: "Kelp?! Seaweed?! Yuck!" But, kelp is highly nutritious and tastes delicious if cooked properly!

Funny story, my mother freaked out when I started taking pictures while prepping the food.
Her: "WHAT ARE YOU DOING!?"
Me: "Taking pictures for the blog..."
Her: "But this dish is so simple...you should not let everyone see how lazy we are..."
Me: "But that's the point, Ma. Peopl
e don't want to slave for hours trying to make a complicated dish."
----------------------------------------------------------------------------------------------------

Here's what you'll need:
--Kelp (I use 3 sheets dried)
--1 Package of Flavored
Tofu
--2 Carrots
--Soy Sauce (or Soy Sauce substitute)
--Brown or Turbinado Sugar


How To Buy and Prep the Kelp:
I get my Kelp in dry form from a l
ocal asian grocery store. You can choose to buy already prepped ones if you want to save time. They are usually in a bucket near the produce section.

If you go for the dry option:
Everything is labeled 'dried seaweed', so make sure you're getting the packages with thick and rigid sheets instead of the flimsy, seasoned roasted seaweeds made for snacking (see picture on the right).

Now, you need to soak the dried seaweed in a pot of water until it softens. The amount of time ranges from 10-30 minutes depending on the brand you buy. I just leave it there and come back later.

After your kelp is done soaking, this is where it gets a bit slimy. Kelp has a gelling property so it'll be sticky, but I like to think of it as moisturizing. Cut the kelp into strips. (Tip: use the tip of the knife and cut parallel to the direction of growth so it doesn't crumble when
cooking) The wider the strips, the easier it'll be to tie.

Now comes the tricky part: making the tie. If you're pressed for time, I suggest you skip this step. It's super slippery and time consuming if you don't have practice. Purpose of bow-ties? Aesthetic reasons and to make it easier to pick up with chopsticks. What I do is, I pin one side down to the cutting board with my fingernail so it doesn't slip all over. It's a bit difficult at first, but you'll gradually get the hang of it. And presto! Your seaweed is ready to be incorporated into the dish.


Making the dish:
1. Prep the kelp.
2. Cut carrots. Cut the flavored tofu into cubes. (Each piece should make 8 cubes).
3. Boil a pot of water. Throw in the kelp for about 30 seconds and dump the water o
ut. This gets rid off some saltiness and the strong taste that most people dislike.
4. Pour water about 1/3 of the way into the pot. Put the carrots and tofu cubes in.
5. Add 2-3 spoonfuls of soy sauce (or your choice of soy sauce substitute...I use Bragg's, so I use 4 spoonfuls. If you use soy s
auce, you use less because it has higher sodium).
6. Bring to boil. Then, turn the heat to low and simmer for about 30 minutes.
7. Add a half spoonful of sugar. I use Turbinado Sugar.
8. Continue to simmer for about 15 minutes.
Taste the tofu to see if the flavor has sunk in. If not, simmer a bit longer.


Happy eating!

Sunday, July 5, 2009

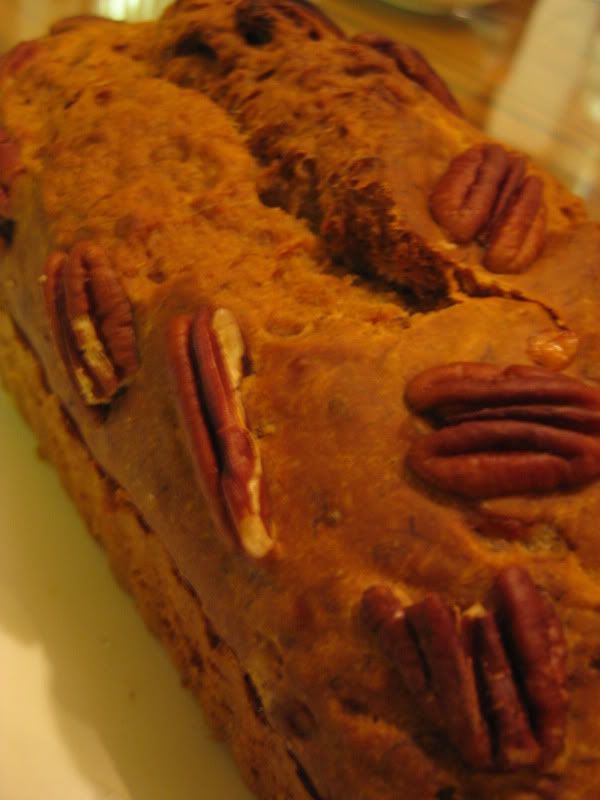
Banana Pecan Bread/"Pound Cake"

This is supposed to be like those nut-loaves sold in the baked goods section at Whole Foods. It turned out better than expected. My whole family, who used to be skeptical that anyone can make baked goods without eggs, milk, sugar, and honey, always demand that I make more.

So, I think this is a good recipe to start off the blog with...

It's a good way to get rid of those overly ripe bananas. :)


3 bananas
1/3 cup oil
5 tsp agave nectar (or your choice of sweetener)
1/2 cup water
1 tsp vanilla extract
2 cups unbleached flour
1 1/2 tsp baking soda
1/2 tsp salt
chopped pecans

1. Preheat oven to 350°F.
2. Put peeled bananas in a large bowl. Drizzle oil and sweetener over it. Mash until smooth.
3. Add water and vanilla extract.
4. Add flour, baking soda, and salt.
5. Mix until smooth. Add desired amount of pecans.
6. Pour in loaf pan. Bake for 40-50 minutes.
(Stick a skewer (or knife or chopstick) into the cake to see if it's done.
If batter sticks, bake for 5 more minutes until done.)
7. Use a knife to wedge the cake out of the pan and onto a plate. Drizzle top with sweetener.

Happy eating!
Blog Widget by LinkWithin